Contents
- What is embroidery?
- At what age can kids learn embroidery?
- How to teach a young child embroidery?
- What are the benefits of teaching children embroidery?
- What basic embroidery tools and materials are needed for teaching children embroidery?
If you know a child who enjoys drawing, then now is a great time for them to learn embroidery. Many children are used to making masterpieces with pens and paints, so the novelty of making something with new tools is irresistible for curious young minds! 🎨
You might be thinking “A needle? Thread? How could embroidery be suitable for a young child?” Well, the good news is that embroidery tools and embroidery equipment can be adapted for different ages to keep everyone safe, so that teaching children embroidery can be fun and relaxing.

What is embroidery?
Embroidery is the art of decorating material with stitches to make shapes and patterns. Styles of embroidery can be as varied as styles of painting, so your little one’s imagination can really run wild. The basic premise of embroidery is simple, the needle goes up and down through the embroidery material. Even small children with short attention spans can see their vision coming together quickly, making embroidery a really satisfying activity that can be completed in one sitting.
At what age can kids learn embroidery?
This depends on the dexterity of each child, but generally, from the age of three years old and upwards a child can get involved with embroidery. If you know a child who has got the hang of threading a chunky wooden bead onto a string, then they have the potential to learn embroidery basics too.
Method #1 for the youngest learners
When teaching children embroidery, the youngest learners should begin with a large, plastic yarn needle which will have a blunt tip. Instead of embroidery floss, young beginners should use yarn 🧶 (the type that you might knit a jumper with). Lengths of yarn cut to 20-30cm in different colours will be much more manageable for teaching children embroidery.
Finally, younger embroiderers should sew their yarn into plastic canvas which will be more comfortable than sewing into slippery fabric. Plastic canvas is a gridded sheet that has flexibility and can be cut into different shaped templates such as a coaster, or a bookmark shape. The holes in the grid are large enough for the needle and yarn to easily be pulled through, plus the plastic grid is also a convenient guide to know where to put the needle.
How to teach a young child embroidery?
Teaching children embroidery who are very young, can be as simple as threading the needle with yarn, tying a knot in the end of the yarn and pulling up the needle from underneath a piece of plastic canvas. Then putting the needle back down through the canvas, into the next hole. Demonstrate just two or three times and then hand over and supervise.
When teaching children embroidery on plastic canvas, they might not sew into the canvas in a neat way at first, it doesn’t matter. Embrace missed stitches, skipped stitches, random colour choices and all other abstract elements of their design 🧵. The important thing is that the child understands the motion of moving the needle through the canvas and back up again and enjoys the process.
Method #2 for older learners
In our experience, when teaching children embroidery who are older, they can still really enjoy the method of embroidering with yarn, a large, blunt needle and plastic canvas. However, if you wanted to make the embroidery more challenging for older children then instead of plastic canvas they can use any plain, thin fabric without stretch. A scrap cut from an old white pillow case would be ideal. Yarn is too thick to smoothly pull through this kind of fabric, so embroidery floss and a sharp needle are a must. Plus an embroidery hoop to hold the fabric taut.
With a piece of fabric secured into the embroidery hoop and a threaded needle, children can begin creating shapes and patterns even with a simple running stitch or back stitch. Other children may prefer to draw a design first in pencil on the fabric, such as a star, their name or an animal, and then use the pencil lines as a guide when embroidering.
These are the simplest ways to get children started in embroidery, no knowledge of special stitches are required at first to create interesting designs, then you can add in other stitches which you can see close up demonstrations of on YouTube. We’re fans in particular of the Lazy Daisy stitch, Satin stitch and Whipped back stitch for beginners. You don’t need to get overwhelmed with teaching all of the stitches though. Check out this British artist 👩🏻🎨 who creates abstract embroidery using pretty much only Satin stitch.
What are the benefits of teaching children embroidery?
Due to the bright colours, and encouraging unstructured creativity, it doesn’t take much encouragement to get children interested in embroidery. When teaching children embroidery, they’ll want to get started right away and for many, their attention will be held for a long time. When children are embroidering, they are also practising concentrating 🧠 on the task for an extended period, and are often determined to finish their project and think creatively about their design while fine-tuning their motor skills. Embroidery is a wonderfully portable craft and can be enjoyed anywhere too!
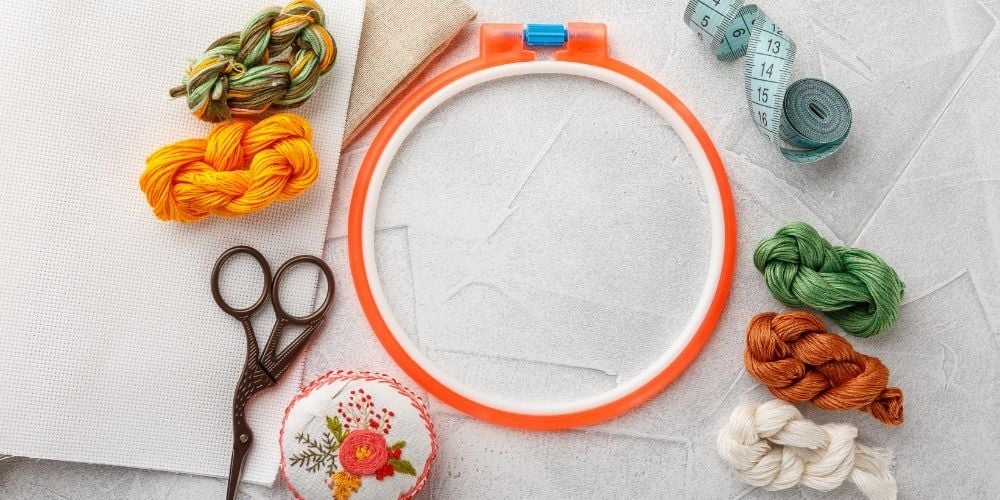
What basic embroidery tools and materials are needed for teaching children embroidery?
Often simple ready-made embroidery kits for kids can be convenient, but all you really need for young learners is:
- Plastic canvas cut into a shape
- Yarn in various colours
- Blunt canvas needle
- Scissors (for young sewers, it’s better if you are in charge of cutting yarn)
Older children learning embroidery need:
- A piece of material to embroider on
- An embroidery hoop
- Embroidery floss in various colours or sewing thread, if that’s all that you have.
- A sewing needle – An ordinary needle from your sewing box will be suitable
- A pencil to draw a design (optional)
- Age-appropriate scissors
There’s a world of embroidery tools on the market! But try not to get sucked into buying any unnecessary tools or expensive equipment and start with these simple supplies first.